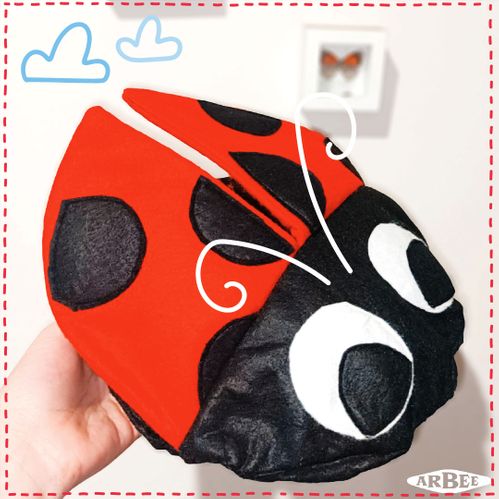
Hobby fill: Fun DIY Lady Bug Cushion Craft Activity
Date: 14-03-2023
In this article, you'll learn how to make your very own toy lady bug cushion using hobbyfill.
What is hobby fill?
Hobby fill is a type of toy stuffing material that is used in the process of making soft toys and stuffed animals. It is a synthetic, non-allergenic material that is easy to use and provides a soft, plush feel to toys.
How to make a lady bug cushion
What you’ll need:
- Sewing machine & hand needle
- Hand scissors
- Black and white sewing thread
- Hobby fill
- Red, black and white felt
- Dressmaking pins to hold the felt pieces together
Instructions:
- Cut 2 circles out of black felt for the body of the ladybug, you can make this as large or small as you like
- Once you have decided on the size of your ladybug pillow, using the red felt, trace out 2 more circles the same size as the black circles.
- Fold the red circles in half and cut, you should now have 4 semi-circles.
- Decide how large you want the head of your ladybug (the black part), and cut back on the red felt circles, leaving the black part exposed. These 4 red pieces will now be used to create the wings.
- Cut out a few smaller black circles to be the dots along the wings of the ladybug.
- With the white felt, cut out the eyes, and then smaller black circles to finish it off.
- You should now have a few shapes cut out of your felt that look like the below:
- Place two red semi-circle wing shapes on top of each other, and guide out where you want your black dots. Pin these so you don’t lose their spots. Trim around the black spots that are spilling over the wings, and cut in half any spots that are overlaying between the two wings.
- Sew the black spots onto one layer of the red wings. Once your dots are secure, remove their pins, and pair together the wings with dots and without dots together. Face one wing with dots towards another plain wing, and sew around the edges, leaving the design on the inside, and a small gap on the top to allow flipping inside out.
- Flip your wings inside out and sew them to one of your large black circles. You should now have one plain black circle, and another with your wings attached.
- Sew the smaller eye black dots onto the larger white dot to create your two eyes. Sew these onto the black part of the circle with the wings. Use pins where necessary to secure your pieces. You should now have a plain black circle, and a black circle with eyes and wings.
- Place the plain black circle on top of your other circle, you should have the design facing inwards, and the outside should be black. Pin these together and sew the outside, leaving a small gap to fill with hobby fill.
- Turn the pillow inside out, and fill with hobby fill to your desired thickness. Sew the hole up with thread and a hand needle.
- Your pillow should now be done!


